Zettablock
Zettablock is a web3 data platform for indexing, querying and analyzing blockchain data. It is used in building highly functional GraphQL API via SQL in a fast and seamless manner. As a web3 infrastructure, it helps mitigate the cost of setting up data warehouses, pipelines and API Endpoints and instead allows developers to focus on using the readily provided data via the API.
With its speed and low latency, Zettablock GraphQL is very useful for developing a wide array of applications for the web3 ecosystem. In this article, I will walk you through the development of a telegram bot that retrieves NFT data on the polygon network. This bot was developed using zettablock GraphQL and JavaScript
Setting up Zettablock GraphQL API
Zettablock GraphQL has a curated list of APIs created by the community for speedy and seamless development, useful for developers seeking to experience the flexibility of the GraphQL API. For a more robust and streamlined API, custom APIs are used and follow user-defined metrics. To get started, head over to
and register to begin creating and using the GraphQL API.
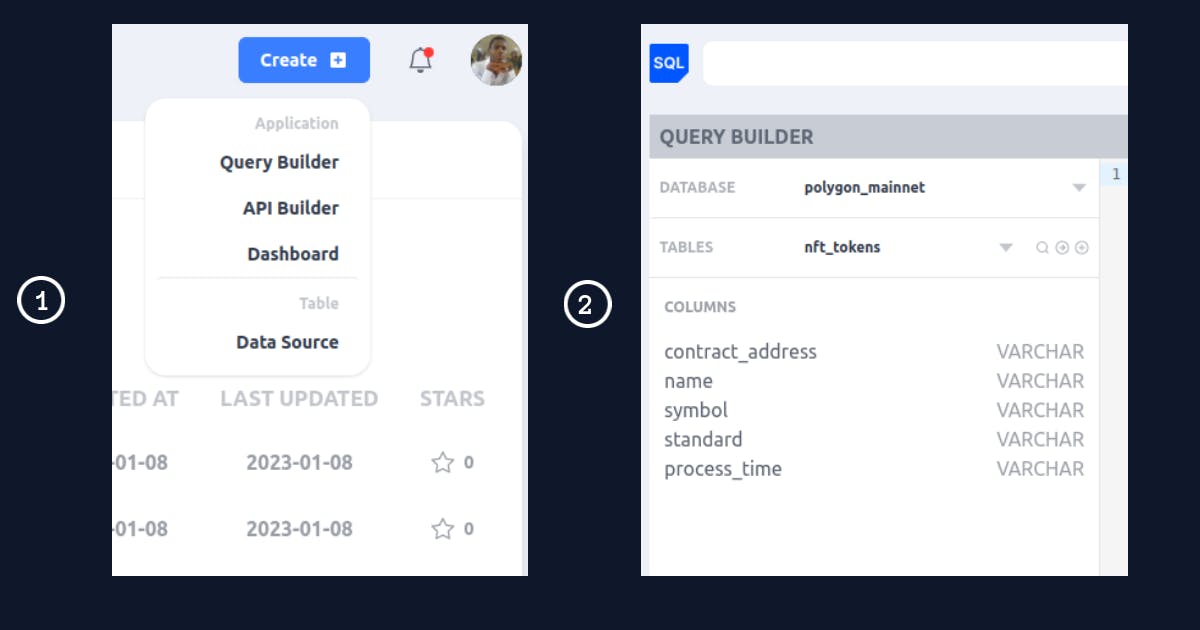
Click on create and select "query builder", to the left of the resulting page, choose "polygon_mainnet" for the database field and "nft_token" for the table field
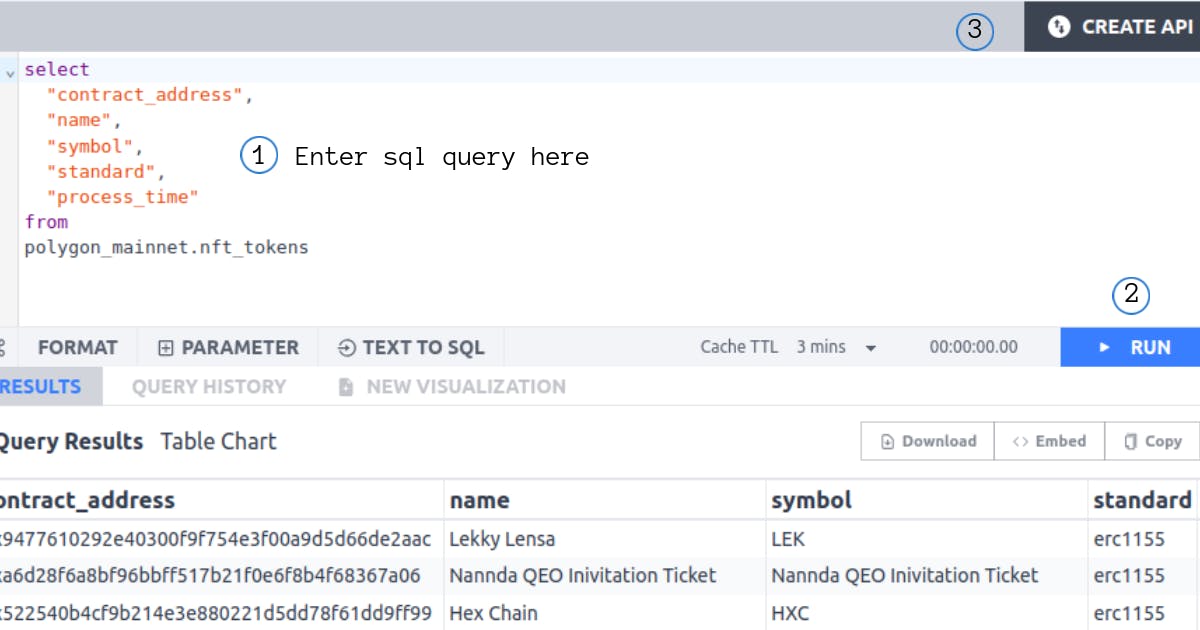
Enter the custom query in the space provided, click run to ensure that you get back the desired output, and finally click "Create API"
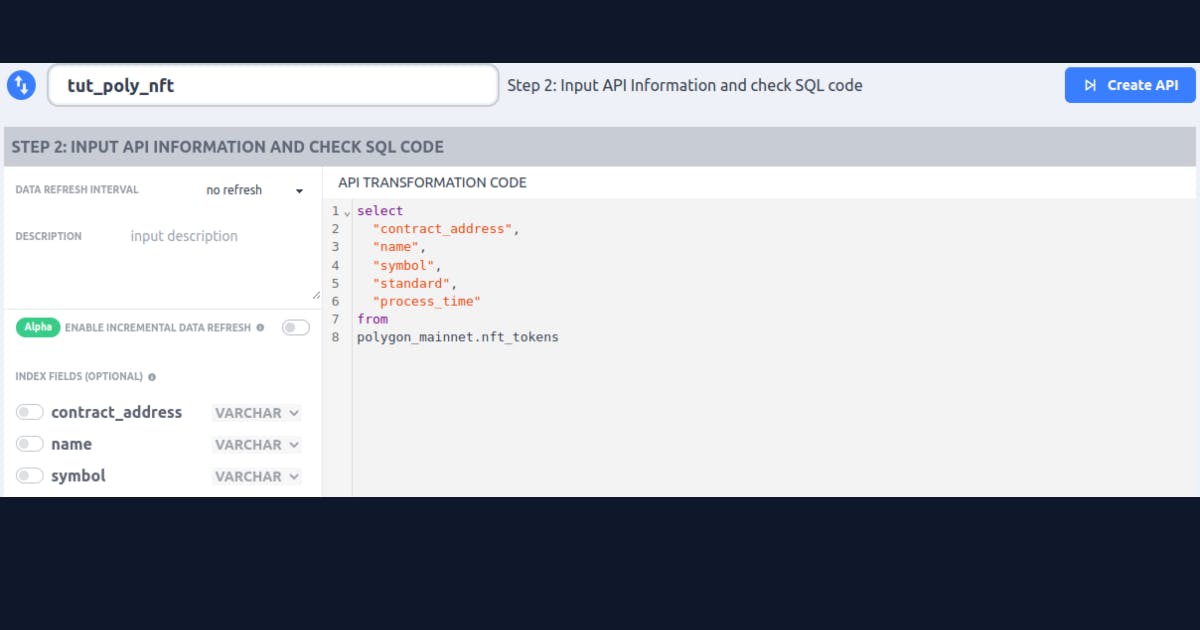
In the resulting page, fill in more details for your API such as "refresh interval", "description" and indexed fields. When all is set, click "Create API"
Next, Under the GraphQL URL, click on the "copy" icon, and copy your zettablock API ID and zettablock API Key (The masked part of the GraphQL URL is your API ID, Click on Manage API Key to view your API Key). Ensure to keep them safe for later use.
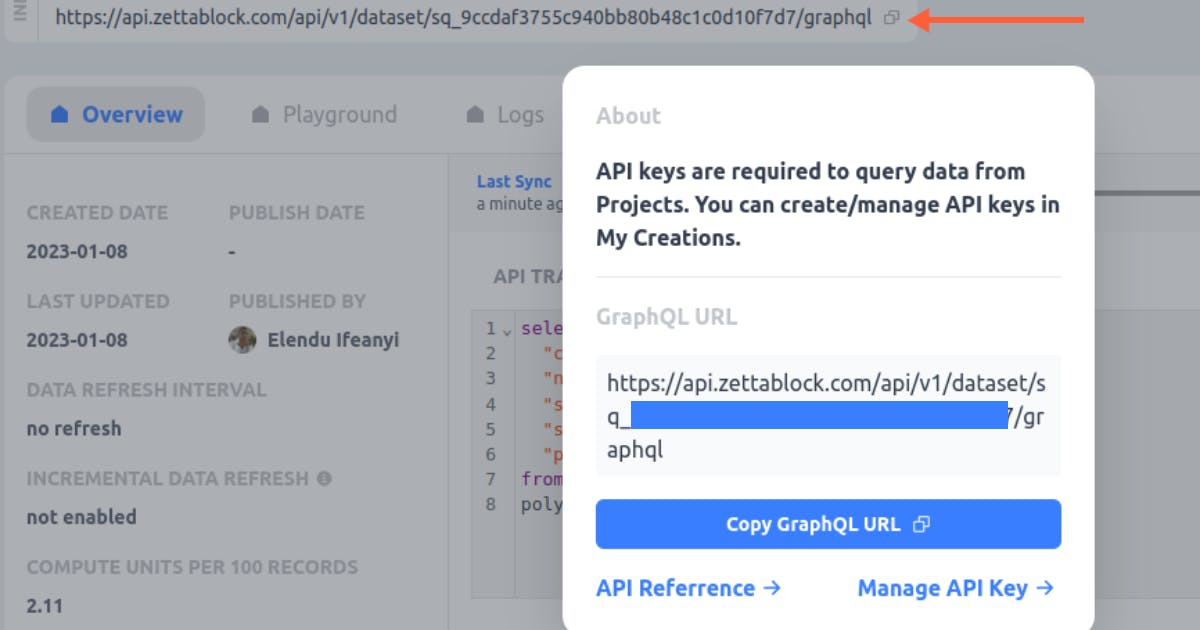
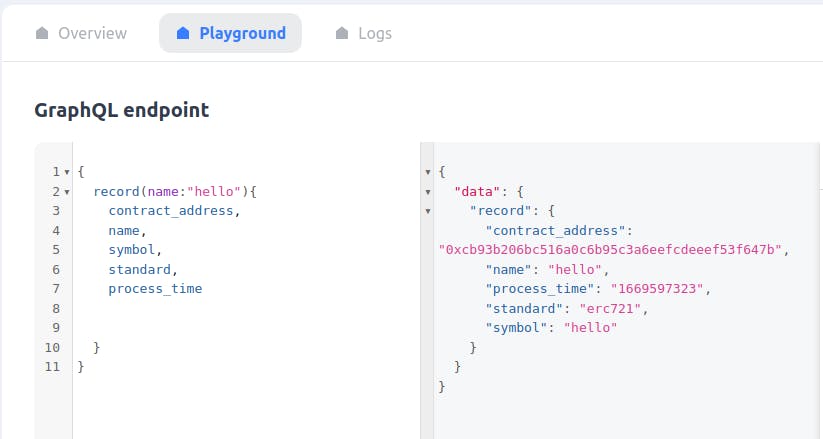
In this same view, click on the "playground" tab and test out your GraphQL endpoint that will be utilized in the bot development. Click on the big play "icon", and your GraphQL endpoint is ready.
Creating the Bot
The "Bot Father" bot is an easy go to for developing, initializing a telegram bot and getting an HTTP Key (bot Token) for later use in a JavaScript or python project to add functionality or custom logic to a bot. For an in-depth view of telegram bot creation, this tutorial is very helpful:
Building a telegram bot
Using the bot father, give your custom bot a name and other properties. Copy the generated Bot Token.
Integrating the zettablock GraphQL with the bot
For this purpose, we are going to use JavaScript (preferably typescript) to initialize a project and install the needed components.
Create a directory and initialize it to produce a "package.json" file, in the same vein, install the needed dependencies
 > npm init --y

 > yarn add dotenv telegraf typescript ts-node @types/node nodemon axios
Create a ".env" file and populate it with your keys
 BOT_TOKEN="bot token goes here"
 ZETTABLOCK_API_KEY="api key"
 ZETTABLOCK_API_ID="app id"
Create a new file, preferably "Bot.ts" and populate it with codes similar to the ones below
 import { Telegraf } from 'telegraf';
 import dotenv from 'dotenv';
 import { text } from 'stream/consumers';
 import requestDataFromPolygon from './request';

 dotenv.config();

 //create bot object using telegraf
 const bot = new Telegraf(process.env.BOT_TOKEN as string);
 const helpMessage = ` Here is a list of useful commands
         /help - for help
         /start - to start the bot
         /nft  <nft name> - to get details about the polygon token`;

 //invoked when we use the start command on telegram bot
 bot.start((ctx) => {
   ctx.reply('welcome to polygon token bot');
   ctx.reply(helpMessage);
 });

 bot.command(['nft', 'NFT', 'Nft'], async (ctx) => {
   const textArr = ctx.message.text.split(' ');
   const command = textArr.shift();
   const tokenName = textArr.join(' ') || null;

   if (tokenName && textArr.length === 1) {
     const record = await requestDataFromPolygon(tokenName);
     //check if returned record has value or not
     if (!record?.contract_address) {
       return ctx.reply('No record with given token name');
     }

     const messageToSend = `<i>Details for nft Name: </i><b>${tokenName}</b>\n<b>standard</b>-${record?.standard}\n<b>Name</b> - ${record?.name}\n<b>symbol</b> - ${record?.symbol}\n<b>Contract Address</b> - ${record?.contract_address}\n<b>process time</b> - ${record?.process_time}
     `;

     ctx.replyWithHTML(messageToSend, { disable_web_page_preview: true });
   } else {
     ctx.reply('invalid command! Try again');
   }
 });

 //on help command
 bot.help((ctx) => {
   ctx.reply(helpMessage);
 });

 //make bot ready
 bot.launch();
This code creates a custom command that will be used to retrieve information about a given NFT. When a user enters "/NFT <NFT name>". It has an import that process requests to the zettablock GraphQL API we created using our keys and ID and returns a formatted result based on the NFT name passed. This code ensures that the given query is a valid NFT.
For full code and repository, use the following link
Polygon NFT Bot
to see how everything comes togetherin the terminal, run
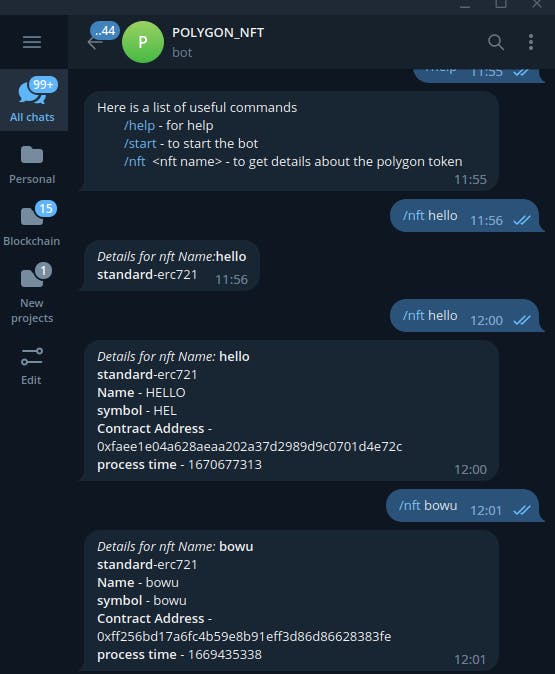
npx nodemon bot.tsto start the server. This is needed as it looks for changes in files and updates accordingly. Go to your bot on telegram and see the progress so far.
Mine looks like this:
Final Words
Building a telegram bot can be achieved using JavaScript or python, and becomes easier when coupled with the botfather creator bot. For web3 data query and integration, zettablock gives a simple and easy infrastructure that is both reliable and fast for developing bot solutions that provide feedback right in telegram.
Here is the GitHub repository for the finished project
