


Blockchain as a distributed and decentralized system of the ledger is home to a plethora of transactions happening regularly, from NFTs to tokens to smart contracts and more. A lot of activities go on in the Blockchain. Aside from the cost of querying such data, there's a skill curve to accessing them.
Covalent aims to solve this problem.
As a decentralized data infrastructure, Covalent provides an API that allows users to query indexed blockchain data fast and seamlessly. From historical transactions on Ethereum to data on other Blockchains, covalent has made such operations possible by providing endpoints that allow the user to get specific information on Blockchain data, whether it's querying NFT transaction or getting the owner of an NFT or the number of transactions that occurred at a given time or even getting NFT metadata, covalent has got you covered.
Postman is an API platform for building and using APIs.
In this tutorial, I will walk you through using the postman covalent collection to visualize and access rich Blockchain data.
Requirements
Covalent API key and
A postman account.
To get a covalent API key, navigate to https://www.covalenthq.com/platform/#/auth/login
Create a new account if you haven’t and register for a free API key. You should now see a key beginning with “ckey….” that is your API key.
Now head on to postman https://www.postman.com to create a free account too. Once fully registered, proceed with the steps below
Covalent Collections
For ease of use, PostMan has a feature called collections, where popular API endpoints are bundled to form a harmonized data source for easy querying. You can find collections like Covalent API collection, PayPal API collection and lots of others. We will be using the Covalent API collection.
Activate the Power!
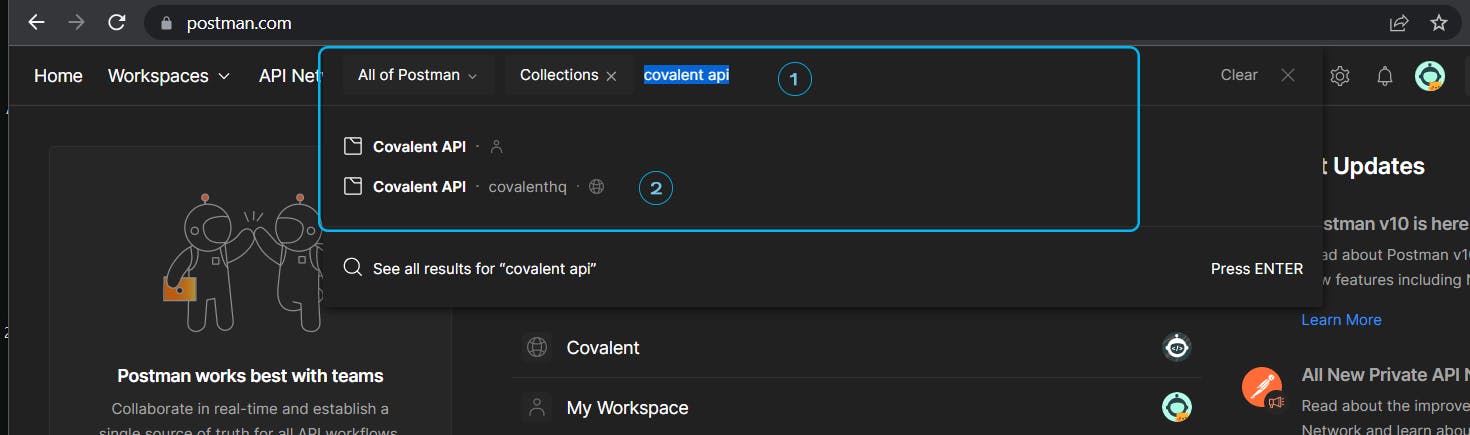
While in the Postman Interface, Click on Search, chose collections, type in "Covalent API" and choose the Covalent API Collection as shown below
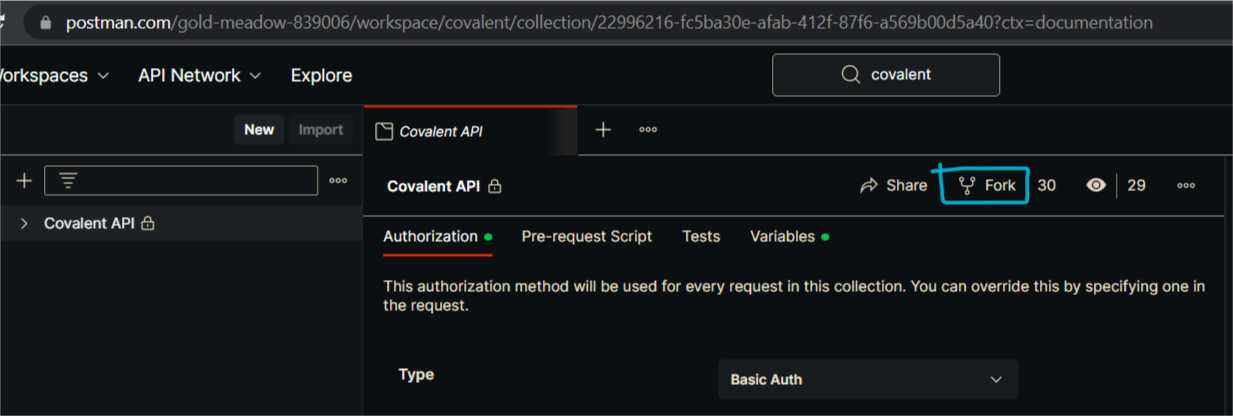
To make requests, you will need to fork the collection into your workspace, to do that simply click on "fork" on the ensuing page
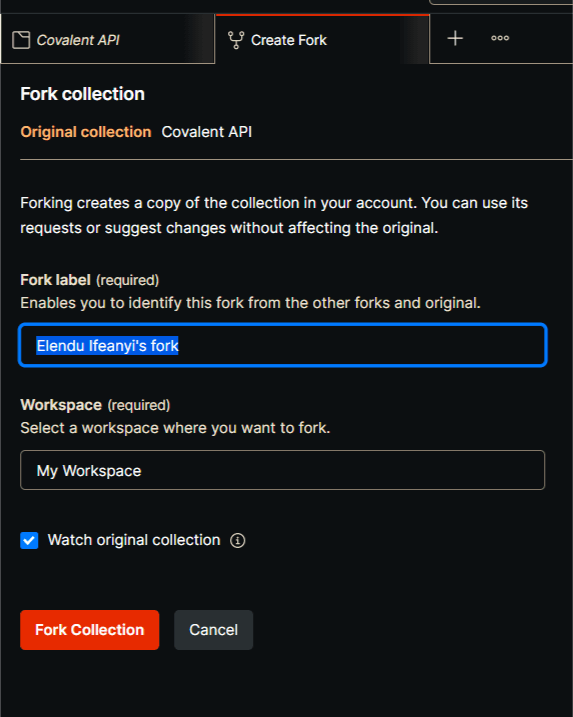
in the resulting page, enter a label for your fork, then click on “fork collection”.
Global Authorization
Next is to set up authorization and global variables at the parent level. Global variables and authorization allow you to set values once that will be reused across all endpoints when making varying requests, so you wouldn’t have to manually do so whenever you want to make new requests.
To set these, follow the steps outlined in the image below. First click on the tree structure by the left, ensure to click on the parent structure titled “Covalent API”, next click on authorization, in the box labeled type, click on basic auth then below it in the “username” field, copy and paste your covalent API key. Finally, click on “save” at the top right.
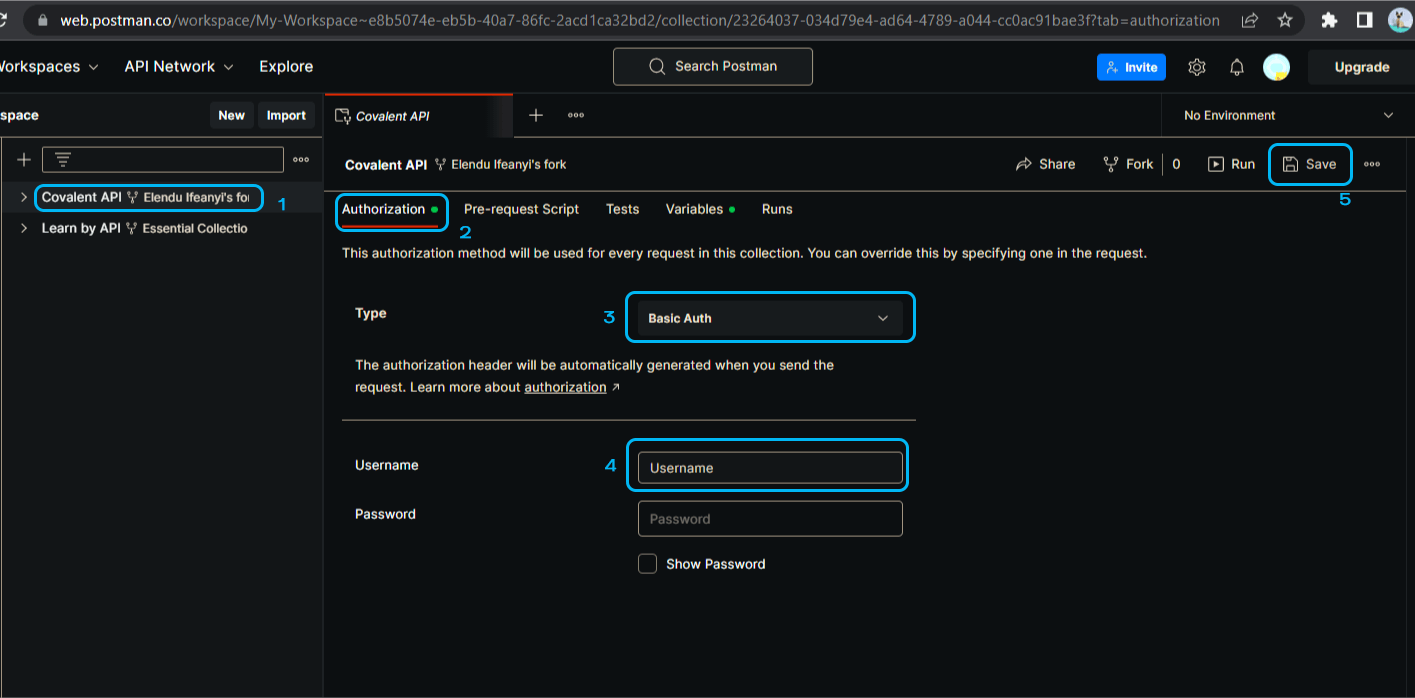
while on this page, you could click on the “variables” tab in the same row as authorization and fiddle with varying information you would like to set for your API requests such as wallet address, chain ID etc.
Though global authorization and variables setting is meant to be ideal, I find setting authorization and values for my custom requests via individual endpoints to be more effective. This way, my requests always return the information I need with fewer errors.
Using Endpoints
Covalent provides two classes of endpoints; Class A endpoints which return data applicable to all blockchains, and Class B which returns data specific to a particular protocol or blockchain. We will be dwelling mostly on the Class A endpoints, as they are the most commonly used.
Let me walk you through making requests using the NFT endpoint, specifically the Get Nft metadata for contracts endpoint. We will be getting metadata for the Bored Ape Yacht Club contract 0xBC4CA0EdA7647A8aB7C2061c2E118A18a936f13D with token ID 9000 on Ethereum with chain_id of 1
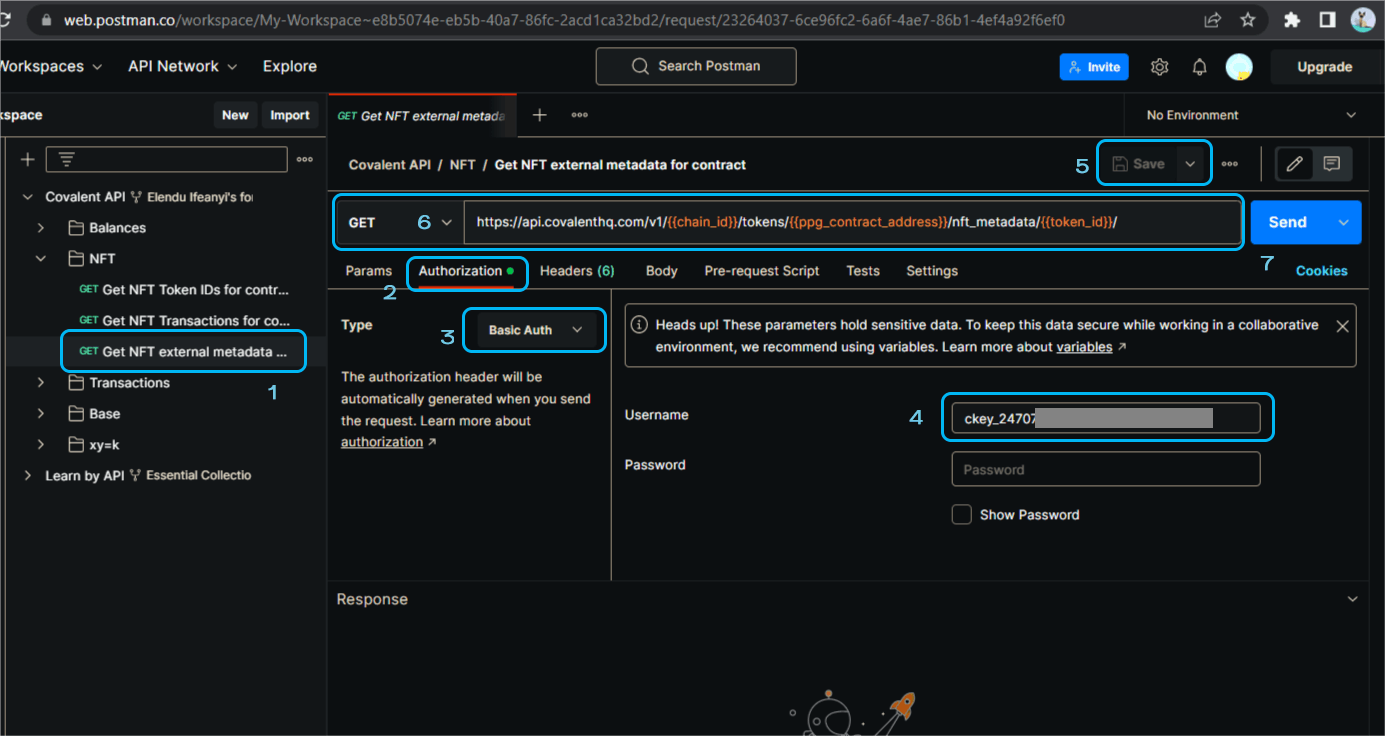
Using the image above as a guide;
From the tree structure to the left, navigate and click on
get NFT metadata for contractsunder the NFT subheading.Click on
authorization(I always do this while calling individual endpoints, just my preference)On the authorization type, click on
basic authEnter your API key
Click on
save(just for checks)At the URL section, ensure the method is set to
GET. Now adjust the URL to suit your request. In the places colored orange, edit them and input your parameters, for chain_id, input1, for ppg_contract, input0xBC4CA0EdA7647A8aB7C2061c2E118A18a936f13Dand for token_id, input9000. Finally, your URL should look like this:https://api.covalenthq.com/v1/1/tokens/0xBC4CA0EdA7647A8aB7C2061c2E118A18a936f13D/nft_metadata/9000/Click on
Send
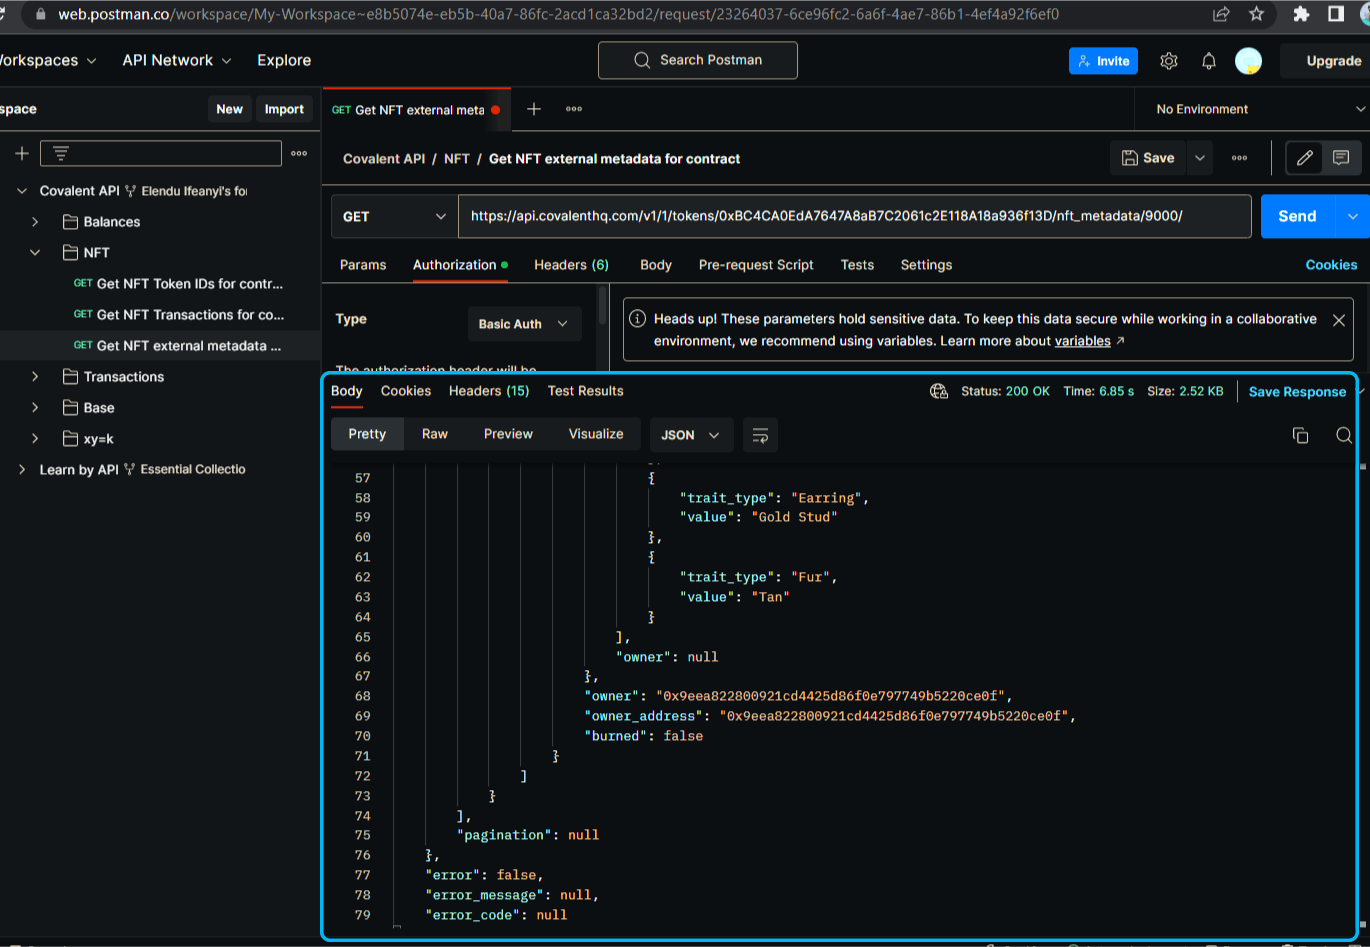
From the above, you can see the traits of the NFT and the current owner.
Now that is how to make a request using the covalent API with Postman. If you will, you can peruse and try fiddling with more endpoints and see what you get. Thank you
Resources:
https://www.covalenthq.com/docs/tools/covalent-postman-collection/https://www.covalenthq.com/docs/api/#/0/0/USD/1