


Unity as a cross-platform game engine is used to develop both 3D and 2D games on varying platforms. It is powerful and easy to use as it readily runs on both web, mobile and desktop environments. With extended plugins, it can also be used to develop blockchain games via custom SDKs (software development kit). Among such SDKs is the Third Web Gaming kit, which has great support for web3 game development. Thirdweb gaming kit comes pre-installed with components and demos to help give developers a head start and readily connects to wallets for read and write operations.
In this article, I will be detailing the development of Loon Flight, a web3 game built using the Third Web Gaming kit and unity.
Technologies used for this development include:
Unity hub and editor
Thirdweb token drop contract
Thirdweb gaming kit
C#
Basic knowledge of UI design
Set-Up
For a good overview of setting up your machine for unity and web3 game development, I will recommend this tutorial
Getting Started with Unity and Thirdweb SDK
as it provides detailed steps for setting up unity, integrating Thirdweb and deploying your game.
About Loon-Flight
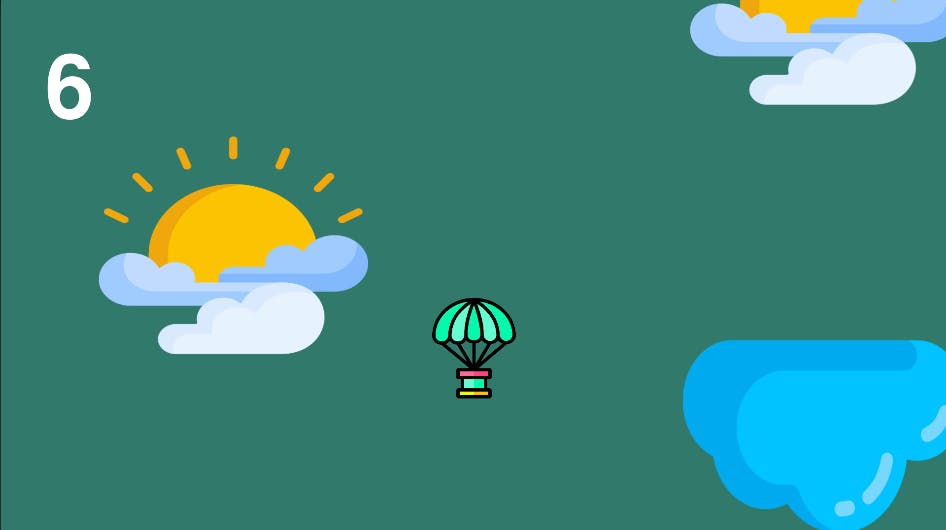
Loon flight is a web3 game that runs on web browsers and allows players to control a hot air balloon by keeping it afloat, navigating past obstacles while avoiding collisions and accumulating points. Once the accumulated points reach a certain threshold, the player becomes eligible for withdrawing the loons token directly into his/her wallet.
Flight Scene

So first we start with a game character; The hot air balloon. This is a Sprite, which can be an image or some custom asset, preferably in transparent PNG format. It is rendered with a Sprite renderer component that sits upon a game object, which is the building block for all interactive objects in unity.
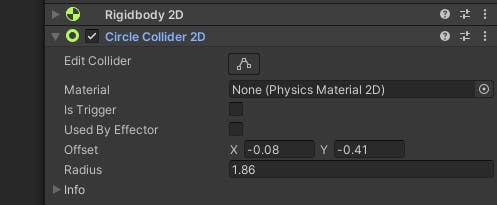
A Rigidbody 2d component is added to the balloon game object to provide physics to it and allows it to fall under gravity
A Circle collider 2d component is also added to give the balloon object the ability to collide with other objects in the environment, this in essence gives it a sense of having a solid body.
A C# Script is also added as a component to define custom in-game logic like controlling the lift of the balloon. Of particular interest is the snippet below.
 void Update()
    {
        if(Input.GetKeyDown(KeyCode.Space) && loonIsAlive){
            myRigidbody.velocity = Vector2.up * flapStrength;
        }

    }
this code is responsible for enabling the balloon to stay in flight. It uses the rigidbody2d feature to set velocity in the upward direction.
In the same scene, a cloud object is created to simulate a moving cloud mechanic, which is also embedded with a collider 2d component. This object comprises a top, bottom and middle layer which is invisible (used to control scoring logic). A prefab is also generated from this game object, which is then used for spawning new objects within a specific time frame from the right to the left axis of the screen.
```csharp void spawnCloud(){
    float lowestPoint = transform.position.y - heightOffset;
    float highestPoint = transform.position.y + heightOffset;
       Instantiate(pipe, new Vector3(transform.position.x, Random.Range(lowestPoint, highestPoint), 0), transform.rotation);
   }
```
The last game object in this scene is the game-over canvas. This is used to display a game-over view, where one can choose to replay or claim their loons token when the accumulated points surpass the threshold. This view becomes active when the balloon character collides with a cloud object. Logic is achieved by setting the game-over canvas to true, thereby making it visible.
 public void gameOver(){
        gameOverScreen.SetActive(true);

    }
Start Scene
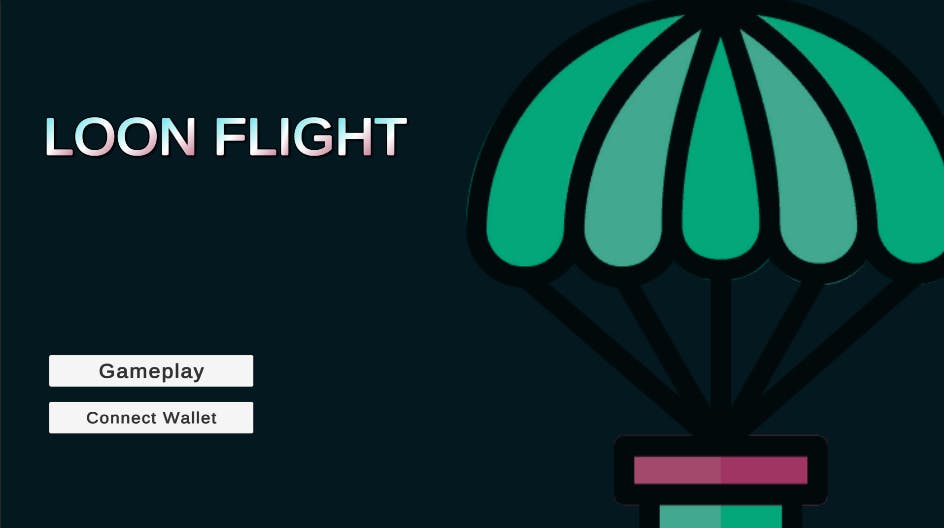
This is the landing scene of the game. When started, it contains logic for connecting your wallet and ensures that only the connected wallet has access to the game. This functionality is made possible via the third web SDK which is imported into the C# script and used to provide logic for connecting the wallet and setting up the appropriate network
public async void ConnectWallet(){
       string address = await SDKManager.instance.SDK.wallet.Connect(new Thirdweb.WalletConnection()
       {
               provider = Thirdweb.WalletProvider.MetaMask,
               chainId = 5

       }
       );
       addressTxt.text = address;

       connected.SetActive(true);
       disconnected.SetActive(false);
   }
The design is achieved using a game object which holds canvas, image, buttons and associated text. These objects are each connected to an associated script that controls their behavior. For example, the gameplay button is hooked to an on-click event that is controlled by the gameplay script, whose major logic is to load the gameplay screen.
public void showGameplay(){
       SceneManager.LoadScene("Gameplay");
   }
}
An enter button is also present in this scene, which is used to load the actual game scene (flight scene)
public void EnterGame(){
       SceneManager.LoadScene("BirdScene");
   }
Gameplay Scene
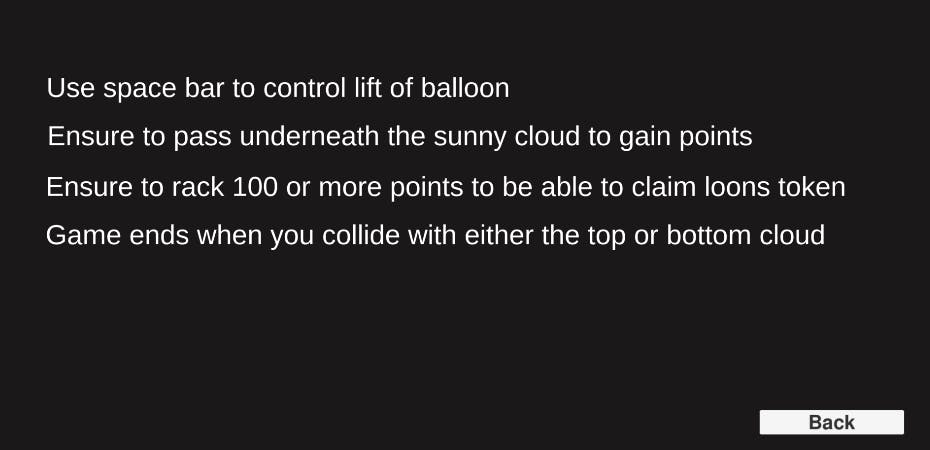
Finally, the gameplay scene.
This scene serves as a tutorial view that gives detailed instructions on how to play the game. It comprises a button and text object layered over a canvas background. This back button when clicked is used to load the start scene (Similar to the codes above)
Building and Running the Game
After designing the game scenes and all the logic. It is important to add each scene to the unity build to easily track and reference them. Also set up the platform to WebGL, to enable it to run on web browsers
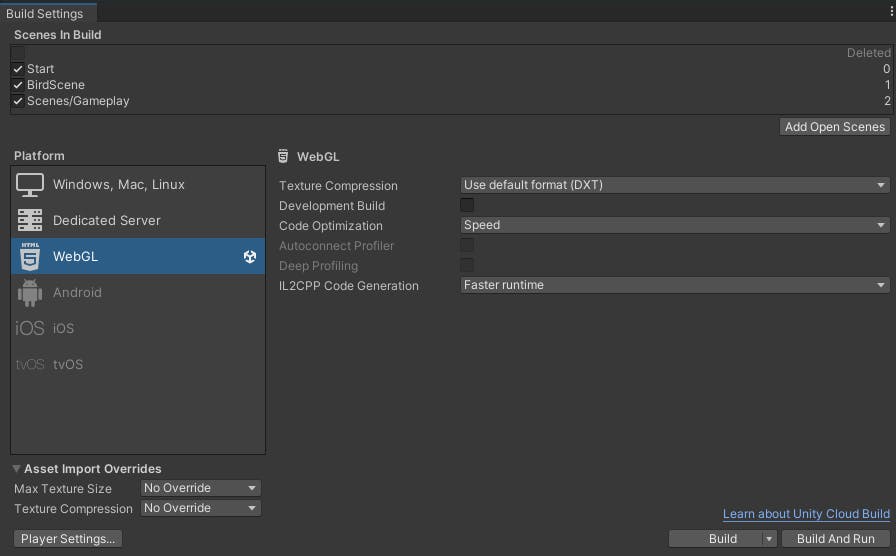
Clicking "build and run", starts the game on the local machine, which can be used for testing out functionality and performance.
Deployment
Once everything is laid out as expected and the game is good to be published, it is now time to deploy the game for hosting so that it can be made available to all on the web. Various platforms exist for hosting, but luckily ThirdWeb via IPFS has a decentralized solution (IPFS is a decentralized storage system where files can be hosted and accessed on the web). ThirdWeb integrates very well with IPFS, hence deployment is easy. To deploy your project to IPFS, on your local machine navigate to your build folder (this is different from your project folder, the build folder is generated when you first build your game via the build settings and is referenced on the further running of the game). Using the build directory as your pointer, enter the following commands
npx thirdweb@latest upload .
This will initialize the necessary resources and upload your build files to IPFS which can now be accessed from anywhere in the world. A sample IPFS link looks like this:
https://ipfs.io/ipfs/QmYh9copyukw6Mxe59qLR8e53hyyy5yyxCqwWiz6Mkg1pd/
This is the location for the Loon-Flight game that can now be played.
Improvement and Additional Features
There are further improvements that I would love to add to this game, these include:
Game timer, which limits how long a user can spend on a game
Animations: maybe a splash screen or certain explosions to give the game an action fee
Better landscape design by utilizing more beautiful UI and Graphics
The source code for loon flight can be found at this repository
https://github.com/gudchyld/Loon-Flight
and the game url at this location : https://ipfs.io/ipfs/QmYh9copyukw6Mxe59qLR8e53hyyy5yyxCqwWiz6Mkg1pd/